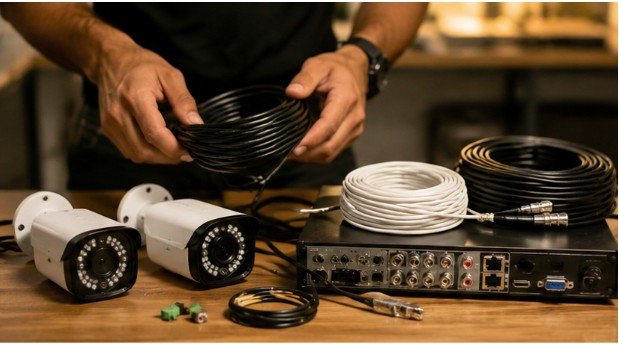
Commercial cable cameras used in stadium broadcasts generate over 3,000 pounds of line tension and cost upwards of $100,000, yet the fundamental physics governing their movement can be replicated for under $150. By understanding basic vector mechanics and load distribution, filmmakers can capture smooth, sweeping aerial shots through dense tree canopies or indoors where FAA drone regulations prohibit flight.
Building a custom rig does not require an engineering degree, but it does demand respect for dynamic loads, anchor stability, and vibration dampening. This diy cable camera system guide breaks down the mechanical principles, hardware selection, and rigging protocols needed to build a reliable aerial cinema rig without risking your camera payload.
The Physics of Overhead Tracking: Drones vs. Cable Cams
While quadcopters dominate modern aerial cinematography, they face severe operational limitations. A study published by the Federal Aviation Administration (FAA) highlights strict flight prohibitions over non-consenting crowds and within restricted airspace under 14 CFR Part 107. Drones also suffer from battery flight limits of 20 to 30 minutes and struggle in tight, brush-heavy environments where GPS signals drop or propellers strike branches.
Cable camera systems eliminate these friction points. By constraining motion to a fixed physical axis, cable cams deliver repeatable, rock-steady trajectories regardless of wind speed or magnetic interference.
- Fixed Trajectory: Allows repeatable tracking shots for multi-take action sequences.
- Zero Rotor Noise: Crucial for recording clean narrative audio on location.
- Unlimited Duration: Manual or tethered systems operate continuously without battery swaps.
- Over-Crowd Safety: When rigged with rated static lines and backup safety lanyards, cable systems provide low-risk overhead passage in public spaces.
Assembling the Trolley: Essential Hardware and Line Mechanics
Building a functional trolley requires balancing strength, low friction, and low weight. A gravity-based cable cam uses simple mechanical components that form a balanced sliding carriage.
+————————————————————-+
| MAIN STATIC CABLE / ROPE |
+————————————————————-+
\ /
\ [U-Groove Pulley] [U-Groove Pulley] /
+——–+——————-+——–+
| T-Bracket Body |
+———+———+
|
[Ball-Head Mount]
|
[Action Camera]
Essential Materials List
- Main Line: 1/4-inch static climbing rope or UHMWPE (Dyneema) utility line with a minimum breaking strength of 3,000 lbs. Avoid stretchy dynamic climbing ropes.
- Tensioners: Two heavy-duty 2-inch ratchet straps rated for at least 1,000 lbs working load limit.
- Sheaves / Pulleys: Two high-speed U-groove bearings or aluminum clothesline pulleys fitted with sealed ball bearings.
- Chassis: A lightweight T-shaped aluminum bracket or high-density hardwood block.
- Mounting: A standard 1/4″-20 steel camera bolt attached to a mini tripod ball head.
- End Buffers: High-density EVA foam blocks or dense rubber stoppers placed 6 feet from each anchor point.
Step-by-Step Rigging Process
- Construct the Carriage: Mount two U-groove pulleys in-line along the top edge of your T-bracket or wood block. Ensure the sheaves align perfectly; misaligned pulleys create friction and cause line chatter.
- Attach the Camera Payload: Thread a 1/4″-20 threaded bolt through the bottom center of the chassis. Thread on a small ball head mount. Suspending the camera lower beneath the pulleys creates a pendulum effect, lowering the center of gravity to keep the rig upright.
- Establish Secure Anchors: Select two live, structurally sound trees or structural steel beams roughly 30 to 50 feet apart. Wrap tree-protector webbing or heavy ratchet straps around each anchor at a height of 7 to 10 feet.
- Thread and Tension: Feed your main line through the trolley pulleys before securing both ends. Connect one end to your fixed anchor and the other to a heavy-duty ratchet strap. Crank the ratchet strap until the line shows minimal sag under manual pressure.
- Install End Stops: Slide thick foam blocks or soft rubber stoppers onto both ends of the line. These prevent the trolley from slamming directly into tree trunks or ratchet hardware at the end of a run. Practicing how to hide security camera cables like a pro rigging guide helps protect wiring from environmental wear and UV degradation.
Mechanical Stability and Vibration Control
Line sag and chassis wobble are the two main enemies of clean footage. Line tension creates exponential force on anchor points. According to rigging load formulas published by the Entertainment Services and Technology Association (ESTA), a cable sag of just 2 degrees requires a tension force nearly 15 times the weight of the payload.
Anchor Force = (Payload Weight × Span Length) / (4 × Sag Depth)
To prevent frame vibration, suspend your camera payload as low as possible below the rope axis. Adding a small counterweight or a lightweight 3-axis motorized gimbal under the trolley isolates high-frequency line chatter. Understanding the artistry behind cable camera systems for concert venues shows how professionals combine tuned dampeners with high-tension lines to eliminate micro-jitter.
If you notice horizontal sway during windy shoots, learn how to stop wobble on cable cam rigs for flawless captures. Adding a secondary stabilizer guide line below the primary track often solves high-frequency oscillation. When building fixed outdoor setups or permanent test lines.
System Comparison: Gravity Rigs vs. Motorized Cable Cams
Choosing between a basic manual setup and an active motorized system depends on your target shot speed, budget, and location constraints.
| Feature / Metric | Manual Gravity System | Motorized Remote Rig |
| Average Cost | $50 – $150 | $600 – $2,500+ |
| Setup Time | 10 – 15 minutes | 30 – 45 minutes |
| Speed Control | Incline dependent | Precision RC Throttle |
| Payload Capacity | 1 – 3 lbs (Action Cams) | 5 – 25 lbs (Cinema Rigs) |
| Primary Limitation | One-way directional runs | Complex battery management |
Editor’s Note: If visualizing setup complexity for your production team, a side-by-side bar chart showing cost versus setup time across manual, motorized, and quadcopter systems provides an effective visual guide.
Frequently Asked Questions
1. What is the best way to run wires for security cameras?
Run wires through interior walls, attic spaces, or protective PVC conduits. Use fish tape to pull cabling, maintain neat runs with cable clamps, and seal exterior wall penetrations with outdoor-grade silicone caulk to prevent moisture entry.
2. What is the best DIY home camera system?
A wireless, battery-powered system like Arlo or Eufy offers the easiest DIY setup. For higher reliability without subscription fees, build a wired Power over Ethernet (PoE) system using Reolink cameras connected to a central Network Video Recorder.
3. How to make a DIY camera easy?
The easiest way is using a Raspberry Pi connected to a Pi Camera Module. Load the Raspberry Pi OS, install MotionEyeOS software for automated motion tracking, and mount the components inside a 3D-printed enclosure or small junction box.
4. How to setup a wired security camera system?
Mount cameras at key vantage points, drill entry holes, and run Cat5e/Cat6 ethernet cables from each camera to a central location. Connect cables to a Power over Ethernet (PoE) switch linked to your Network Video Recorder for power and video feed.
Mastering Your Rig On Location
Building a high-performance DIY cable camera system gives videographers a powerful tool for low-altitude aerial tracking. By selecting low-stretch static lines, managing anchor forces responsibly, and maintaining a low center of gravity, you can produce cinematic shots that rival commercial setups costing thousands more.
Test your system thoroughly with dummy weights before mounting expensive camera gear, inspect your anchor straps before every run, and start capturing smooth, dynamic footage on your next shoot.