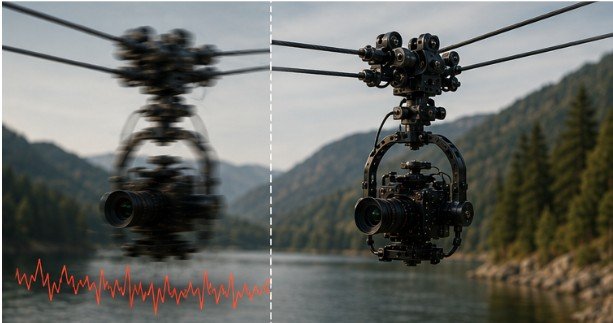
A line stretched tightly across a stadium looks rock-solid, but under the load of a camera rig, it behaves like a massive, elastic guitar string. The moment a motorized sled accelerates or a three-axis gimbal pans left, equal and opposite mechanical reaction forces twist the single-line suspension point.
Understanding how to stop wobble on cable cam rigs isn’t about buying more expensive gear; it’s about solving basic mechanical physics. When a motion picture camera produces sudden lateral motion, the cable transfers energy directly into swaying, low-frequency oscillations, and camera jitter.
By targeting three specific mechanical vectors—perpendicular inertia, pendulum resonance, and vibrational isolation—cinematographers and aerial operators can transform unusable, shaky footages into fluid, theatrical cinema.
CABLE AXIS
==========||========== <– High-frequency vibration travels here
||
+—–+—–+
| Inertia | <– Perpendicular bar blocks rotational twist (roll/yaw)
| Bar |
+—–+—–+
||
[ Isolator ] <– Wire-rope damper absorbs motor micro-jitter
||
( Gimbal ) <– Correctly tuned PID motors keep horizon flat
||
[ Camera ]
The Physics of Suspended Motion: Why Cable Sleds Oscillate
A cable cam suspended on a single Synthetic (Dyneema) or Steel line has zero native rotational stability along its roll and yaw axes. When the internal gimbal motors pan the camera rapidly, the motor casing exerts force back against the sled. Because the cable offers no torsional resistance, the entire sled rotates in the opposite direction.
Furthermore, suspended rigs function as physical pendulums. The system exhibits a natural frequency based on cable length, tension, and the rig’s center of mass. Without active mitigation, speed changes instantly trigger low-frequency side-to-side sway.
+————————+————————————+————————————+
| Wobble Type | Primary Cause | Mechanical Solution |
+————————+————————————+————————————+
| Side-to-Side Sway | Top-heavy COG or pendulum effect | Lower COG / Execute 2.5s Drop Test |
| Rotational Twist | Gimbal pan-axis motor torque | Add Perpendicular Inertia Bar |
| High-Frequency Jitter | Drive motor & pulley micro-vibe | Wire-rope vibration isolator |
| Trampoline Vertical | Cable slack & elastic stretch | High-tension winch / Dual-line run |
+————————+————————————+————————————+
Editor’s Note: A multi-column bar chart comparing rotational resistance against inertia bar width works best to visualize torque dampening.
Stabilizing the Rig: Perpendicular Inertia and Cable Dynamics
To mitigate rotational twist and tracking errors, top riggers employ an inertia bar. This simple modification alters the sled’s moment of inertia, ensuring smooth execution across complex setups.
1. Broadening Perpendicular Inertia
Attach a carbon-fiber or aluminum bar horizontally across the sled, perpendicular to the main cable. Shift heavy accessories—such as V-mount batteries, wireless video transmitters, and counterweights—to the far ends of this bar. By spreading weight away from the central axis, you dramatically increase rotational mass, forcing the gimbal motor to turn the camera lens rather than twisting the sled itself.
2. Tensioning and Dual-Line Rigging
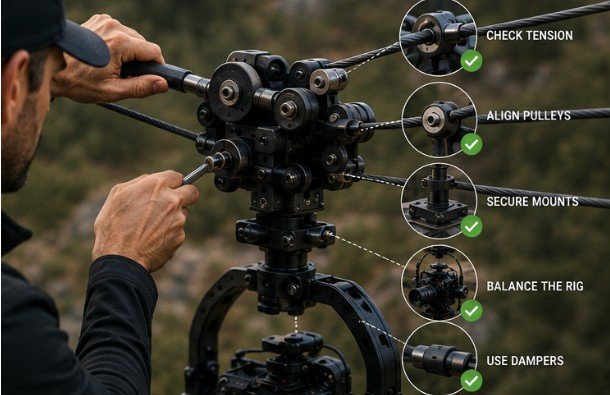
Cable sag induces unwanted vertical bouncing (the trampoline effect). Pre-tension your lines using a ratcheting system or a mechanical winch. Fiber ropes like Dyneema offer minimal stretch compared to standard nylon, but they require accurate weight calculations to ensure safety margins are never breached.
When absolute stability is required, deploy a parallel dual-line system. Running two distinct cables eliminates lateral swaying completely.
3. Lowering Center of Gravity and Tuning “Drop Time”
An improperly balanced rig creates violent pendulum oscillations during rapid acceleration or sudden braking. Adjust your camera height beneath the wheels to fine-tune its balance.
To test your configuration, perform a manual drop test:
- Lift the camera sled 90 degrees horizontally relative to the main cable line.
- Release the sled and measure the time it takes to swing down to a vertical rest position.
- Target a drop time of roughly 2.5 to 3 seconds.
A drop time under two seconds indicates a bottom-heavy setup prone to swinging. Conversely, a drop time exceeding three seconds indicates a top-heavy system vulnerable to tipping over during high-speed tracks.
Isolating Micro-Vibrations and Gimbal Feedback
High-frequency vibration degrades video quality by creating a jelly-like rolling shutter distortion. These high-frequency micro-vibrations originate from pulley friction, drive motor rotation, and textured cable strands.
[ Cable Track ]
||
[ Sled Wheels ]
||
+———————-+
| Wire Rope Isolator | <– Dampens 10-100Hz high-frequency vibration
+———————-+
||
[ 3-Axis Gimbal ]
||
[ Motion Picture Cam ]
Mount a tuned wire-rope isolator between the drive sled and the gimbal mounting plate. Wire-rope isolators absorb multi-axial high-frequency movements before they reach the camera sensor.
Simultaneously, check your 3-axis gimbal’s PID (Proportional, Integral, Derivative) motor settings. Over-tuned gimbal motors cause feedback loops, resulting in electronic chatter and micro-shakes. Lowering the pan-axis stiffness by 10–15% often relaxes the setup enough to ride out natural line fluctuations without feedback compensation.
Advanced Field Execution: Wind, Ramps, and Anchors
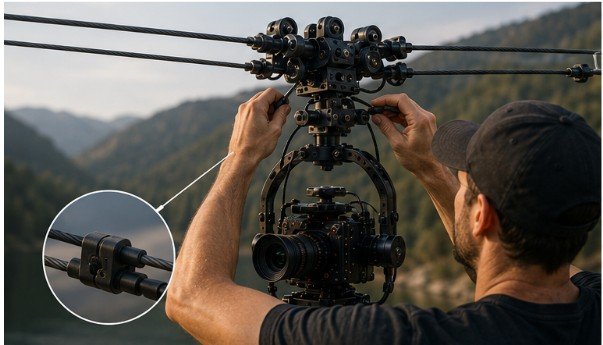
Even a perfectly balanced cable cam can falter under poor operating conditions or improper field rigging.
- Acceleration Ramps: Program soft start and soft stop motion profiles directly into your motor controller software to prevent mechanical shock loads.
- Wind Resistance: High-profile camera setups act like sails in crosswinds. Lower the cross-sectional area by removing unnecessary matte boxes, using compact prime lenses, and keeping cable spans shorter on breezy shoot days.
- Anchor Points: Verify the structural integrity of your anchor systems before tensioning. Learn about safe rigging anchor points for film production to prevent hazardous anchor failures during high-tension setups.
Understanding different composition techniques and fluid camera movement can elevate your final footage. For instance, knowing when to use Dutch angle framing adds dramatic energy to high-speed dynamic tracking shots. Mastering classical types of camera movements allows operators to design smoother cable runs that minimize sudden directional changes.
Troubleshooting Guide: Diagnosing On-Set Instability
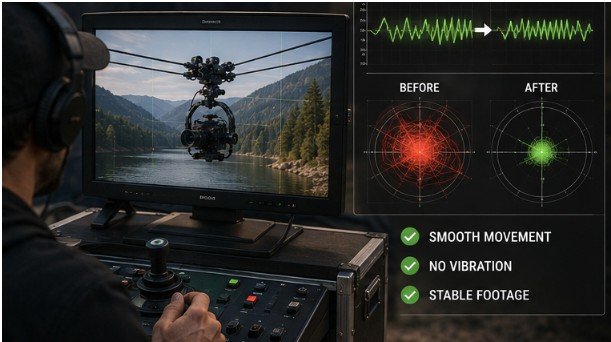
Before rolling camera, walk through this diagnostic checklist to quickly isolate unwanted motion:
- Check System Tension: Verify that line sag remains within designated safety thresholds under full load.
- Execute Drop Test: Verify a swing-down period of 2.5 to 3.0 seconds to balance the center of gravity.
- Inspect Isolators: Ensure wire-rope dampers are not bottoming out or pinched under heavy payloads.
- Test Pan Axis Torque: Rapidly pan the camera left and right; if the sled twists severely, widen your inertia bar weights.
- Calibrate PID Settings: Reduce pan stiffness if motor humming or high-frequency electronic vibration occurs.
Frequently Asked Questions
1. How to stop camera wobble?
Stop camera wobble by securing loose mounting plates, using balanced counterweights, tensioning suspension lines properly, and installing a wire-rope vibration isolator between the rig mount and camera body.
2. How to reduce shaky cam?
Reduce shaky cam by smoothing out acceleration software settings, lowering motor PID stiffness, counterbalancing rotational mass, and deploying optical or sensor-based image stabilization systems.
3. How do I hold my camera steady?
Hold a camera steady by keeping three points of physical contact, supporting the lens weight from underneath, bending your knees to absorb footsteps, or mounting the camera on a stabilized rig.
4. What causes my camera to shake?
Camera shake is caused by high-frequency motor vibrations, uneven weight distribution, wind resistance, abrupt movement stops, or undersized support cables that lack proper tension.
Precision Mechanical Balance Beats Post-Production Fixes
Eliminating cable cam wobble requires balancing physical forces before pressing record. Post-production digital stabilization cropping degrades image quality and cannot recover motion blur caused by mechanical vibration. By mastering center-of-gravity drop times, deploying perpendicular inertia bars, and isolating motor chatter, your suspended camera runs will deliver buttery-smooth, cinematic motion every single time.