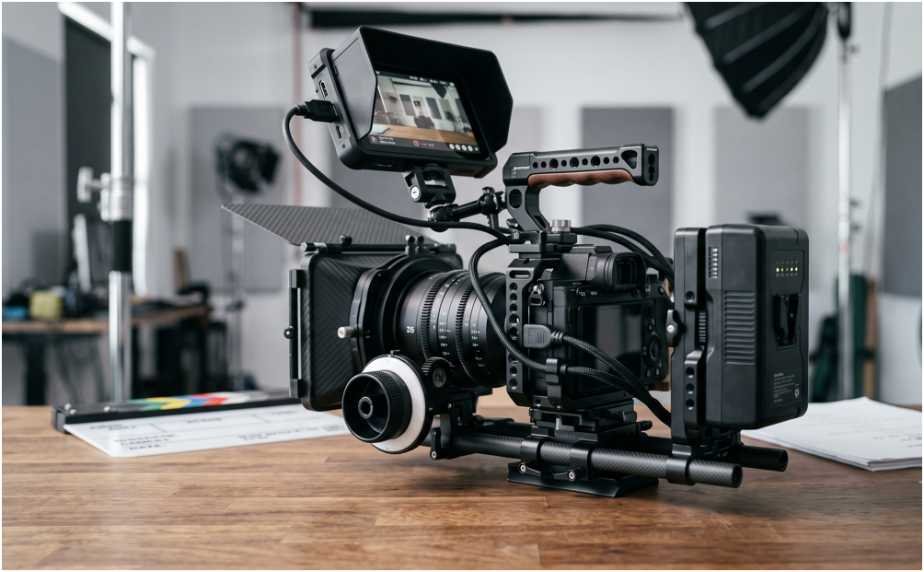
A bare cage protects a camera, but it does not automatically create a usable cinema rig. I have found that the best camera cage accessories for filmmaking rigs solve specific problems: poor handling, short battery life, weak monitoring, exposed ports, or difficult lens control.
My rule is simple. Every attachment must improve the shot or protect the equipment. If it only adds weight and makes the camera look impressive, I leave it in the case.
How I Choose Accessories for a Camera Cage
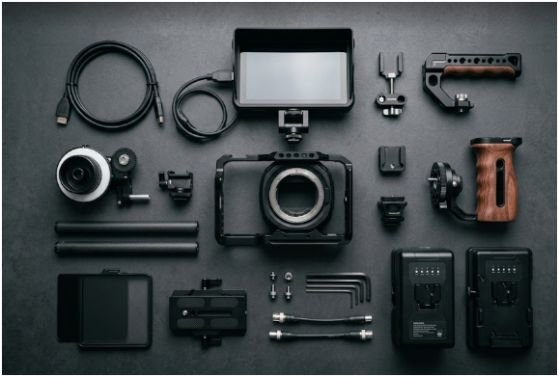
I judge an accessory by five factors: stability, access, balance, setup speed, and compatibility. A monitor arm may feel secure on a table but loosen during handheld movement. A battery plate may offer long runtime but block the camera screen or rear controls.
I also use what I call the mounting-cost test. For every accessory, I ask how much weight, cable movement, power demand, and assembly time it adds. This approach separates genuinely useful upgrades from decorative rig clutter.
The best camera cage accessories for filmmaking rigs should also remain modular. NATO rails, 1/4″-20 threads, 3/8″-16 locating mounts, and 15mm rods make it easier to rebuild the camera for handheld, tripod, shoulder, or gimbal work.
1. Top Handle for Better Camera Control
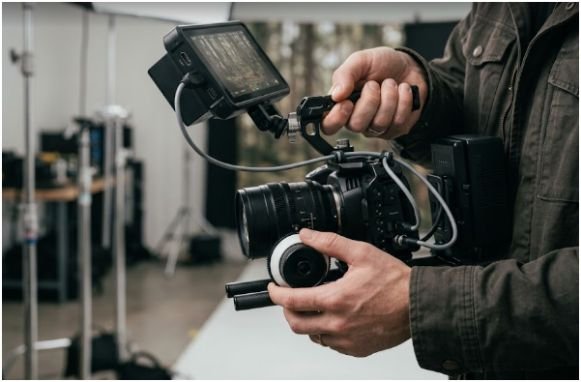
A top handle is usually my first addition. It gives me a secure lifting point, improves low-angle operation, and provides mounting space for a monitor, microphone, or wireless receiver.
I prefer handles with multiple threaded points and at least one cold shoe. Anti-twist 3/8″-16 locating holes provide more resistance than a basic single-screw connection. ARRI uses 3/8″-16 interfaces with locating pins across many professional mounting products because the pins help prevent unwanted rotation.
NATO Rail or Screw-Mounted Handle?
A NATO top handle works well when I need fast removal. I can slide it forward or backward to find the rig’s center of gravity.
A screw-mounted handle takes longer to reposition, but it often feels better on heavier builds. I use one when the handle must support a monitor, transmitter, or other high-mounted accessory.
2. Side Handle for Longer Handheld Shoots
A side handle gives my second hand a natural contact point. This reduces wrist strain and makes small pans or reframing movements easier.
Wooden grips feel comfortable during long sessions, while rubber or silicone grips offer better traction in rain or humid conditions. I look for adjustable height because the camera’s record button, card door, and cable ports must remain accessible.
A powered side handle can also provide run-and-stop control. However, I only use one after checking camera compatibility and cable routing.
3. Monitor Mount for Accurate Viewing
A monitor becomes difficult to use when its mount sags, twists, or blocks the camera controls. For compact builds, I use a short articulating arm or tilt mount with anti-twist pins.
A ball-head magic arm offers flexible positioning for a monitor, recorder, or small LED. However, a dedicated tilt mount usually holds a heavier monitor more securely.
I position the monitor close to the camera’s centerline. Mounting it too far left or right creates leverage, which makes the entire rig feel heavier than its measured weight.
4. HDMI and USB-C Cable Clamps
Cable clamps are among the least exciting yet most valuable additions. Mirrorless camera ports can experience strain when a connected cable gets pulled, twisted, or caught on clothing.
A dedicated HDMI or USB-C clamp secures the connector near the cage. This reduces movement at the port and helps prevent an interrupted monitor or recorder signal.
SmallRig includes dedicated HDMI clamps in several cage kits and describes them as a way to prevent accidental disconnection and maintain stable transmission.
For me, the best camera cage accessories for filmmaking rigs protect expensive components before adding convenience. That makes a cable clamp more important than many visually impressive attachments.
5. V-Mount or Gold Mount Battery Plate
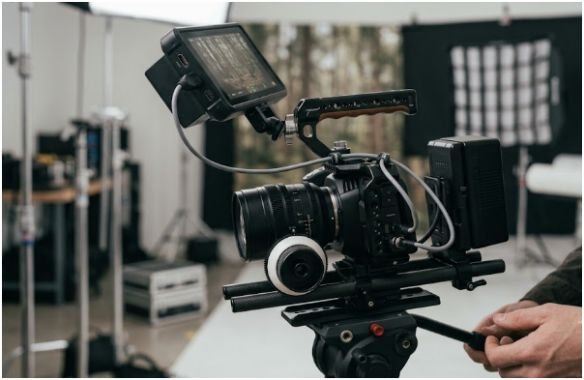
A monitor, transmitter, focus motor, and camera can drain small internal batteries quickly. A V-Mount or Gold Mount plate centralizes power around one larger cinema battery.
I prefer a plate with clearly labelled regulated outputs. Voltage must match the device being powered. A physical connector fitting into a port does not guarantee safe electrical compatibility.
Battery placement also changes balance. A rear-mounted battery can counterbalance a heavy lens, but it may block the screen. A vertical plate keeps the build narrow, while a hinged plate improves access to the camera battery compartment.
Current cage kits increasingly combine top handles, cable protection, and compact V-Mount plates, showing how handling and power now form one connected rigging system.
6. 15mm Baseplate and Rod System
A 15mm baseplate creates a stable foundation for lens accessories. Two rods can carry a matte box, follow focus, lens support, battery plate, or shoulder pad.
Correct rod alignment matters. If the baseplate places the lens too high or low, accessories may not meet the lens correctly. Heavy lenses also need support rather than relying entirely on the camera mount.
Know how to choose rod length for 15mm rod system setup for cinema camera rigs, position the baseplate, maintain lens alignment, and prevent front-heavy balance.
Tilta produces top, side, and bottom rod holders for different cage configurations. Its rod systems support accessories such as focus motors, matte boxes, and lens supports.
7. Matte Box for Light and Filter Control
A matte box blocks stray light and holds filters in front of the lens. I use one when shooting with cinema lenses, strong side lighting, or multiple filters.
A lightweight clamp-on matte box suits handheld and gimbal work. A rod-mounted model works better with larger lenses and heavier filter trays.
Before adding one, I check lens diameter, field of view, filter size, and rod alignment. An oversized matte box can enter the frame on a wide lens.
8. Follow Focus for Repeatable Lens Control
A follow focus gives me more precise control than turning the lens barrel directly. It becomes useful for repeatable focus pulls, geared cinema lenses, or shots involving a dedicated focus puller.
Mechanical units are simple and dependable. Wireless systems allow remote focus but add motors, controllers, batteries, and cables.
I do not add a follow focus to every build. Autofocus lenses, documentary work, and lightweight gimbal shots may benefit more from a clean setup.
9. Quick-Release Baseplate
A quick-release plate saves time when moving between a tripod, slider, shoulder rig, and handheld setup. Arca-style systems work well for smaller cameras, while larger dovetail plates provide more adjustment for heavy cinema builds.
I check for play before trusting any quick-release system. Even slight movement becomes noticeable with long lenses or controlled pans.
The plate must also allow battery and memory-card access. A fast plate is not useful when I must remove it for every card change.
10. Cold Shoe and Anti-Twist Mounts
Cold shoes work well for lightweight microphones and receivers. I avoid using them for heavy monitors or long articulating arms because a single contact point can twist.
For larger accessories, I prefer 1/4″-20 mounts with locating pins or 3/8″-16 anti-twist connections. These interfaces create a more stable attachment.
This mounting choice is one reason the best camera cage accessories for filmmaking rigs often cost more than generic alternatives. Better hardware reduces rotation, loosening, and repeated readjustment.
My Three-Level Accessory Build
For a minimal handheld rig, I use a cage, top handle, cable clamp, and compact monitor mount. This setup protects the camera while remaining easy to carry.
For documentary work, I add a side handle, external monitor, microphone receiver, and compact battery solution.
For cinema lens work, I add a 15mm baseplate, rods, lens support, matte box, follow focus, and rear battery plate. Building in levels prevents the rig from becoming unnecessarily heavy.
What I Would Leave Off a Lightweight Rig
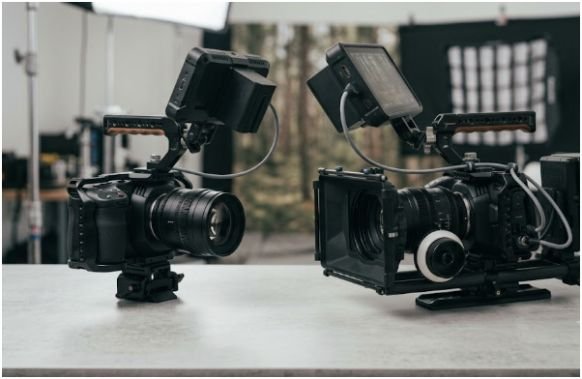
I remove unused rod extensions, oversized arms, extra shoes, redundant handles, and large power plates. I also avoid stacking adapters because each connection creates another possible point of movement.
Weight alone does not define a poor setup. Bad weight placement does. A balanced eight-pound rig can feel easier to control than a front-heavy five-pound build.
Build Smart, Not Like a Gear Magpie
The best camera cage accessories for filmmaking rigs are not the ones that fill every mounting hole. They are the ones that make the camera safer, faster, and easier to operate.
Start with handling and cable protection. Add monitoring and power next. Build a rod system only when the lens or production workflow demands it. Your shoulders, camera ports, and editing schedule will all appreciate the restraint.
Frequently Asked Questions
1. What camera cage accessories should a beginner buy first?
Start with a top handle, HDMI cable clamp, secure monitor mount, and quick-release plate before adding heavier power or lens-control equipment.
2. Do I need 15mm rods on a mirrorless camera rig?
You need 15mm rods when mounting a follow focus, matte box, lens support, shoulder pad, or rear battery plate.
3. Is a V-Mount battery too heavy for a small camera cage?
A compact V-Mount can work well, but its position must balance the lens without blocking controls, ventilation, or the rear screen.
4. Are NATO accessories secure enough for professional filmmaking?
Quality NATO mounts with safety stops are secure for many accessories, although heavy loads may benefit from fixed anti-twist screw connections.